Also check out this RILS on EducatorStudio by Rathanak Loeung. Another great example of actually incorporating 21st Century Skills into core curriculum, instead of just talking about it. I'll be honest this is the first Math lesson I have heard of that asks students for intrapersonal reflection.
The most difficult part of this project was finding a free, efficient method for posting GarageBand enhanced photo podcasts online for critical feedback. I ended up using viddler.com because I thought I had found an easy solution to convert GarageBand audio podcasts (.m4a) into video files (.m4v) using Quicktime Player. Unfortunately the image quality of these files ended up being very hit or miss once they were uploaded and compressed on Viddler. My trial run worked perfectly with no quality issues. For no reason that I could figure out (and I did extensive troubleshooting) most of the students projects would lose considerable image quality in the upload/encode process on viddler as to be unwatchable. My workaround for this was to first convert the .m4a to .mv4 in Quicktime Player, then load the .m4v into iMovie and export and actual .mov file. (exporting a .mov directly from Quicktime player lost quality as well).
After much consideration I decided that GarageBand may not be the best software to use if you are uploading to viddler.com. If the ability to create extensive sound mixes is not and issue and voice and music tracks are all that are needed I would suggest using iMovie or Photostory (if you are on a PC).
Reflecting on the overall process I noticed a vast improvement in student engagement over previous attempts to instruct this unit using both group activities that did not incorporate technology, and online game-style activities (challenge board, who want to be a millionaire, hangman, etc.). Student feedback on effective strategies included creative freedom, posting of daily objectives/procedures, online copies of Keynote lesson presentations and video tutorials.
Most of the ineffective strategies identified by students revolved around actual team dynamics. Some students did not like the random groupings and suggested they be grouped by level of engagement so that unproductive students could not skate by on other productive students efforts. Many identified their own teamwork skills and strategies as needing improvement. Since self-reflection about teamwork was part of my intention this could be considered successful. However, in a mixed grade/academic level elective course such as this some sort of class ice-breaker exercise may be necessary for all students in the class to get to know each other a little better before launching them into accountable group projects.
In this one-week unit students will use a variety of 21st century workplace and technology skills to answer the question, “What are the building blocks of an effective team?” Students will specifically fulfill the Career Technical Education standard for teamwork by working themselves in teams to create a photo/audio podcast in GarageBand or equivalent software. This project encourages students to engage in creative team activities, think critically about their own work, and the work of others.
Target Audience:
My target audience will be High School students’ grades 9-12 in my Audio Production and Digital Media Communication classes.
Materials:
·Activation Videos about Teamwork and Leadership
·5-6 Digital still cameras
·Computers for all students with photo podcasting software (Garageband, Photostory, iMovie)
·Viddler.com Account or other online hosting site for video or podcasts.
·Project Requirements
·Grading Rubric
·List of potential online resources
·Media Arts Production Team Badges (if students are traveling outside of classroom)
Content Objectives:
·Students define characteristics of an effective team.
·Students give examples of various team roles and their responsibilities.
·Students make connections between their own skills and effective teamwork.
Process Objectives:
·Students perform online research.
·Students brainstorm and create a plan as a team.
·Students create an audio and photo podcast in Garageband or other photo/audio editor.
·Students upload their podcasts online for feedback.
·Students review each others finished work and provide constructive feedback.
Procedure:
Duration: 1 week or approx. 5 hours.
I attempted to complete this project in 4 hours (3x50 min classes + 1x 90 min block period) but due to technical issues between GarageBand and Viddler was not able to achieve full completion for all groups and had very little time for students to provide feedback. Despite technical issues most student groups would not have met the day 4 deadline (just over 3 class hours) for completing their podcast and posting it to viddler for review on day 5. All student groups were able to comfortably complete and post their work to viddler in 4 hours of class time. This is why I would advise planning 5 total hours of class time for this project so that there is plenty of time for students to review other students’ work and provide feedback.
1.Play a few Teamwork activation videos. Look up teamwork on youtube and find one you like. Here are a few examples:
2.Have students briefly discuss amongst themselves the common themes they saw in the video. Ask for students to share ideas with the entire class.
3.Tell students that over the next week they will be creating a podcast that addresses the question, “What are the building blocks of an effective team?”
4.Give a brief procedural demonstration of how to create a photo podcast in Garageband or other photo/audio editor.
5.Randomly divide students into teams of 4-5.
6.Provide each group with a printed copy of the project requirements, grading rubric, a list of potential resources, and a digital camera.
7.Inform students they will have the remainder of the current day plus three-four additional class periods to complete the project and let them begin to work. (Most groups needed 4 additional days to complete their projects)
8.Facilitate brainstorming and assist with technical questions that arise for the duration of the project creation. Assist with conversion from GarageBand .m4a to .mov using quicktime player and iMovie. (see teacher reflection notes)
9.On the final day after all projects have been posted to Viddler divide the class into two halves.
10.If students have school issued email address have one half compose emails providing the following information.
a.1 teaching or learning strategy they found effective through the course of the project.
b.1 teaching or learning strategy they found ineffective through the course of the project.
c.1 suggestion from improvement for the ineffective strategy
d.3 things they learned over the course of the project.
If students do not have school issued email addresses, create a Google Form (or similar survey tool) to collect answers in the form of a spreadsheet. http://www.google.com/google-d-s/forms/
11.Have the other half provide critical feedback by posting comments to the Viddler site for the following:
a.2 other projects
b.Their own project
c.At least one of these postings must be a response to someone else’s feedback.
Students need to use descriptive and interpretive language when providing feedback. Evaluative statements like, “It was good,” or “I liked it” must be supported by observation and interpretation to be acceptable.
12.Once students are done with one task have them complete the other.
13.Review student emails and create a plus/delta to identify opportunities for improvement for subsequent project cycles.
Web 2.0 Tool/Emergent Technologies:
GarageBand – Primarily used for audio mixing, recording, or music creation. Photos can be added to create basic slideshow podcasts. This is used to create the podcasts.
Quicktime Player & iMovie – Apple’s free video editing software. These two apps are used to convert GarageBand Podcasts to .mov or .m4v files for upload to viddler. (See teacher reflection notes)
Viddler.com – Viddler is an online video publishing site that provides free ad-supported personal user accounts. This is used for students to post projects online and a platform for providing critical feedback to others.
Social Participtation/Social Learning:
Students will be randomly placed into groups of 3-4. Based on their research and brainstorming groups will take digital photos of each other then divide their project into equal parts that each member of the group can work on individually. Once their individual pieces are completed they must export them from their own GB project and combine all their work into a single GarageBand project to create a single cohesive group podcast. Once all the podcasts have been turned in students will be required to watch and provide critical feedback for two other groups’ projects, and for their own podcast. One of these comments must be in response to someone else’s comment.
Making Connections:
This project builds on a previous lesson about how to combine individual work completed on multiple different computers into a single project on one computer. Students will be asked to draw on their own experiences of being part of a team. Students will hopefully make connections between the actual group process and their research on effective teams, and how that relates to real-word situations.
Create/Produce:
Students will create a group Photo Podcast using Garageband or other photo/audio editor and post their podcast to the classroom Viddler account.
a) Students will be asked to reflect in two ways. The first will be to email the instructor plus/delta comments; strategies that worked, strategies that didn’t work, a suggestion for improvement, and three things they learned over the course of the project. They will also be required to watch and provide critical feedback for two other projects from their own class, one podcast from another class, and for their own podcast. At least two of these must be responses to others’ comments.
b) The instructor will use both the plus/delta comments and the information provided by the students to identify strengths and weaknesses of the project and make adjustments for future projects.
I can't seem to win on this posting issue. I just wasted the last three hours and $15 trying to figure out a hosting solution for the podcasts that my students will be making. As it turns out Viddler will not work for photo podcasts created in GarageBand, because these are technically just enhanced audio files. This has left me in the lurch. I started looking for podcast hosting sites and again everything that is free only has around 20MB of storage which probably won't cut it for multiple projects being uploaded in a week. I discovered that I can post them via most blogs, so I tried it out in Blogger with success as shown below:
However, here I am left with access to adult content, and privacy issues. I saw a post from Alison about Edublogs and I went there and it looked to be perfect solution as long as I payed for a Pro version upgrade.
So with my options limited at midnight on a Friday, and thinking this would be a good long term solution and tool, I shelled out $15.00 and signed up. I attempted a test post and to my disappointment and frustration Edublogs will only play the audio portion of the podcast it does not show the photos. The Premium customer service I payed for only operates Monday-Friday. So I will not receive an answer to my problem before I need to implement this project Monday morning. So at this point I am out of options. I would love to hear some suggestions if anyone has them. If you are reading this and have produced GarageBand photo podcasts and successfully posted them online for your students to provide comments, I would love to hear your solution.
After recovering from my “deer in headlights” feelings of amazement and wonder at the abundance of Web 2.0 tools that are currently available, reality set in as I struggled to find one that was going to fit my needs. At first I was simply overwhelmed by the options and found myself spending precious hours checking out link after link on sites like Go2Web2.0, and Web 2.0 Guru. Each link had potential but none seemed totally feasible for the project I had in mind. I thought about utilizing either Popplet for a group planning project, or simply grabbing challenges from InterroBang, but again these didn’t quite fit with the content I needed to address.
Since the project that I wanted my students to undertake was to create a photo podcast in GarageBand I decided that I should try to find an online collaborative photostory-type application. Basically I was hoping to find a site that would allow various users to upload pictures to a common timeline and then add music and voiceover recording to the pictures. I ran across a couple options but none had all the components that I needed, namely the collaborative features, voice recording capabilites, and free use. For example Animoto is a slick site that turns your images into dynamic animated movies and sets them to music but does not allow precision voice recording as it sounds like their movies are assembled via some sort of algorithm.
Sliderocket is a cloud based enterprise presentation solution that allows for the creation of dynamic slide presentations that can include real time RSS feeds and other social media. Multiple users from different locations can work these presentations simultaneously and everything gets updated via the cloud. Very Cool! This would have been perfect except that the free version did not include any voice or multimedia capabilites.
VuVox was another slick site that allows you to create multimedia collages that can be scrolled through like a timeline. Unfortunately this one was blocked by my school’s web filtering, and I didn’t have the time this week to take up this battle.
Finally there was JayCut which looks like it will be pretty cutting edge, but it is either not yet live or it was recently acquired my RIM to be included in future Blackberry Smart phones (gotta keep up with the iPhone somehow) so was none the less unavailable.
So I decided to go back to using GarageBand for the podcast, and that I would try to address an online posting solution that would allow my students to provide feedback on each other’s work. This is something that I have struggled with since I began teaching. My first year I knew I needed to get stuff online, but as it was my first year teaching, this quickly fell to the bottom of my list of priorities. My second year I created a iWeb page for my classes and began posting student work here. Unfortunately my administrators, due to the “public display of students faces” issue, shut this down a year later. I started using Schooltube but found this to be cumbersome and extremely difficult to manage (I still don’t know how to delete content from my own channel). So after all of this I decided to fall back on the familiar once again and utilize the video hosting site introduced in the EMDT program, Viddler.
The free version of Viddler has some limitations, such as the weekly 2GB upload/download limit, but I decided that I might just be able to make it under the limit, especially since we are only using GarageBand on this first project. On the plus side Viddler has very simple and straight forward video management capabilities that make organization a breeze.
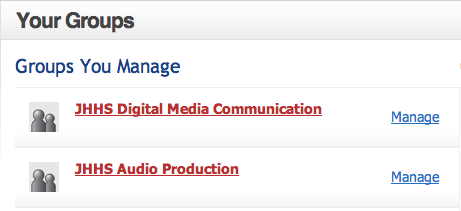
So I set up a new account specifically for my classrooms, and created groups for each classes’ work. To resolve the privacy dilemma, I will be making all the videos private, viewable only by the “MrShup” user, but providing all my students with this login information. Hopefully this will create enough of a restricted access situation to diminish the privacy concerns. Unfortunately this also has downside. When all students log in as “MrShup” all their comments show up as “MrShup.” To resolve this I plan to require all my students to simply include their names in their posts.
So after a long week of exploration I haven’t ended up going too far from what I know, but I think it is the right decision. Tune back in in a week or so for an update on how it all pans out.
InterroBang is a website that makes a game out of Challenge-Based Learning. There are two different user options; one for teachers and one for students. However, both types of user can attempt to complete any of the provided challenges. Each challenge has 4 steps.
This was my challenge!
1.Accept the Challenge:
There are hundreds of challenges that with different point values. Challenges address themes like creativity, culture, science, and service learning. Teachers can also create their own challenges. The more difficult the challenge the more points you can earn.
Since it was the weekend I didn't
have any collaborators to
work with.
2.Review the Project Requirements and Assemble a Team.
Students can choose their teammates and review a rubric outlining the project requirements.
3.Complete the Challenge
Students can print out the project requirements then attempt to complete the challenge.
This is the start of my nature hike
A photo of an aspen tree on my hike.
Research about aspen trees
4.Post your completed challenge on the site.
Students are asked to document their process through out and post evidence to the InterroBang website. Most challenges have a photo or video component built into the project. This gets digital tools into the hands of students and provides them with direction for using them appropriately.
Once you have uploaded your content you must wait for it to be reviewed by a mentor. If the mentor feels the project is not completed according to the rubric they will request revisions before the project gets posted to the site, points are awarded to the students, and it appears in their ‘Deeds’.
As students earn points the also earn ‘badges.’ Badges are also awarded for inclusion of different elements in a project like scientific process, or a piece of fine art. The points and badges create a game-like feedback loop in which students are always trying to reach higher levels or acquire more badges.
This website seems really powerful as it engages students in challenge/project-based learning activities, while simultaneously developing digital literacy. The large variety of activities should make it easy to find projects that align with a variety of curriculums and content standards. Plus it is a virtual gold mine for teachers that are looking for engaging activities for their students. The reason I like this one in particular is that many of the projects incorporate video. I can see tapping into this source often to keep my curriculum fresh, and help students draw connections to other subject areas.
Check it out, try it out in your classrooms, and post your experience back here.
This may be the coolest iMovie feature I never knew about. The Edit to Beat feature. This basically allows you to choose music. Listening to the music while tapping the “m” key on the beats. Then add photos or video to the music track and iMovie basically does your editting for you by making edits at each beat. Crazy!
Another feature that gets you professional looking videos with minimal effort is the movie trailer feature. It basically takes you through a step by step template where all you have to do is add content, and iMovie makes it look and sound like it was produced professionally.
I could see both of these features being very useful for a school news situation where the amount of time for editing is limited before the video needs to be broadcast. I plan to use both of these features in an upcoming project at my school where my class is supposed to document a community service day in the morning and have something to display by lunchtime. This 8 min video just saved me and my students hours.